
Using DreamBooth on a Mac
With DreamBooth you can fine-tune and add your own images into the AI art’s learning model. Unoriginally I thought I would experiment by feeding it images of me! Feeding it only 15 pictures I was still blown away.
I did try to get this running locally on my Mac but ended up using Google’s Colab for this experiment. This is cheating in the context of my blog, however, training a new model is an infrequent task so why spend too long figuring it all out on the Mac when a Colab notebook already does the job. The whole training process takes about 30 mins.
Having Google Drive (gdrive) setup is handy so you can permanently save the new check-point model generated. The only other prerequisite is having a HuggingFace access token but this is free also. You just have to create an account and read/accept the terms.
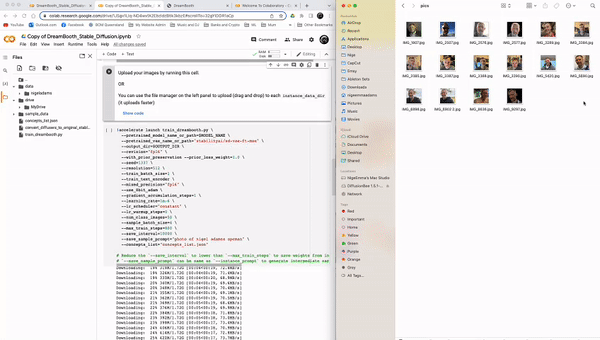
Start by creating a new folder on your computer and add 10 or more input images of yourself (or the subject you want to use). The images must be 500 pixels x 500 pixels. Don’t worry about removing the background or any fancy photo editing. Try to get a few varying angles of the subject. I used .jpg as the file format and file extension.
The DreamBooth Colab notebook I used is here
Open this up….but note I’m not going to do a full tutorial as you’ll find good instructions quite easily by searching for ‘DreamBooth Colab’ on Google or YouTube. You don’t need programming skills as such and can use the checkpoint model you create in DiffusionBee for fast results without any programming skills.
Here are the code blocks I updated (as per the instructions on the notebook).
Login to HuggingFace
HUGGINGFACE_TOKEN: xxxxx (paste your own token from hugging face after generating)
Settings and Run
save_to_gdrive = True (checked)
OUTPUT_DIR stable_diffusion_weights/nigeladams
This is the output directory on gdrive where the check-point model will be saved. Once you have the model you can download it and use it in other experiments or programs like DiffusionBee to generate the AI art.
Start Training
Update to suit, here are my edits.
concepts_list = [
    {
        "instance_prompt":      "photo of nigel adams spcman",
        "class_prompt":         "photo of a man",
        "instance_data_dir":    "/content/data/nigeladams",
        "class_data_dir":       "/content/data/man"
    },
Obviously remember the instance prompt as that will trigger your image in the AI art generator. After running this cell, the code will generate a folder to upload your training imagess. Refresh the files list and drag and drop your training images as per below.
Run for Generating images.
--save_sample_prompt="photo of nigel adams spcman" \
Run the rest the without changing the code/defaults. The training step (starting !accelerate ) will take 30 mins or so.
After running the cells
At the end of the process navigate to the OUTPUT_DIR in your gdrive and find your checkpoint model. This may be inside a subfolder and will be approximately 2 GB or more.
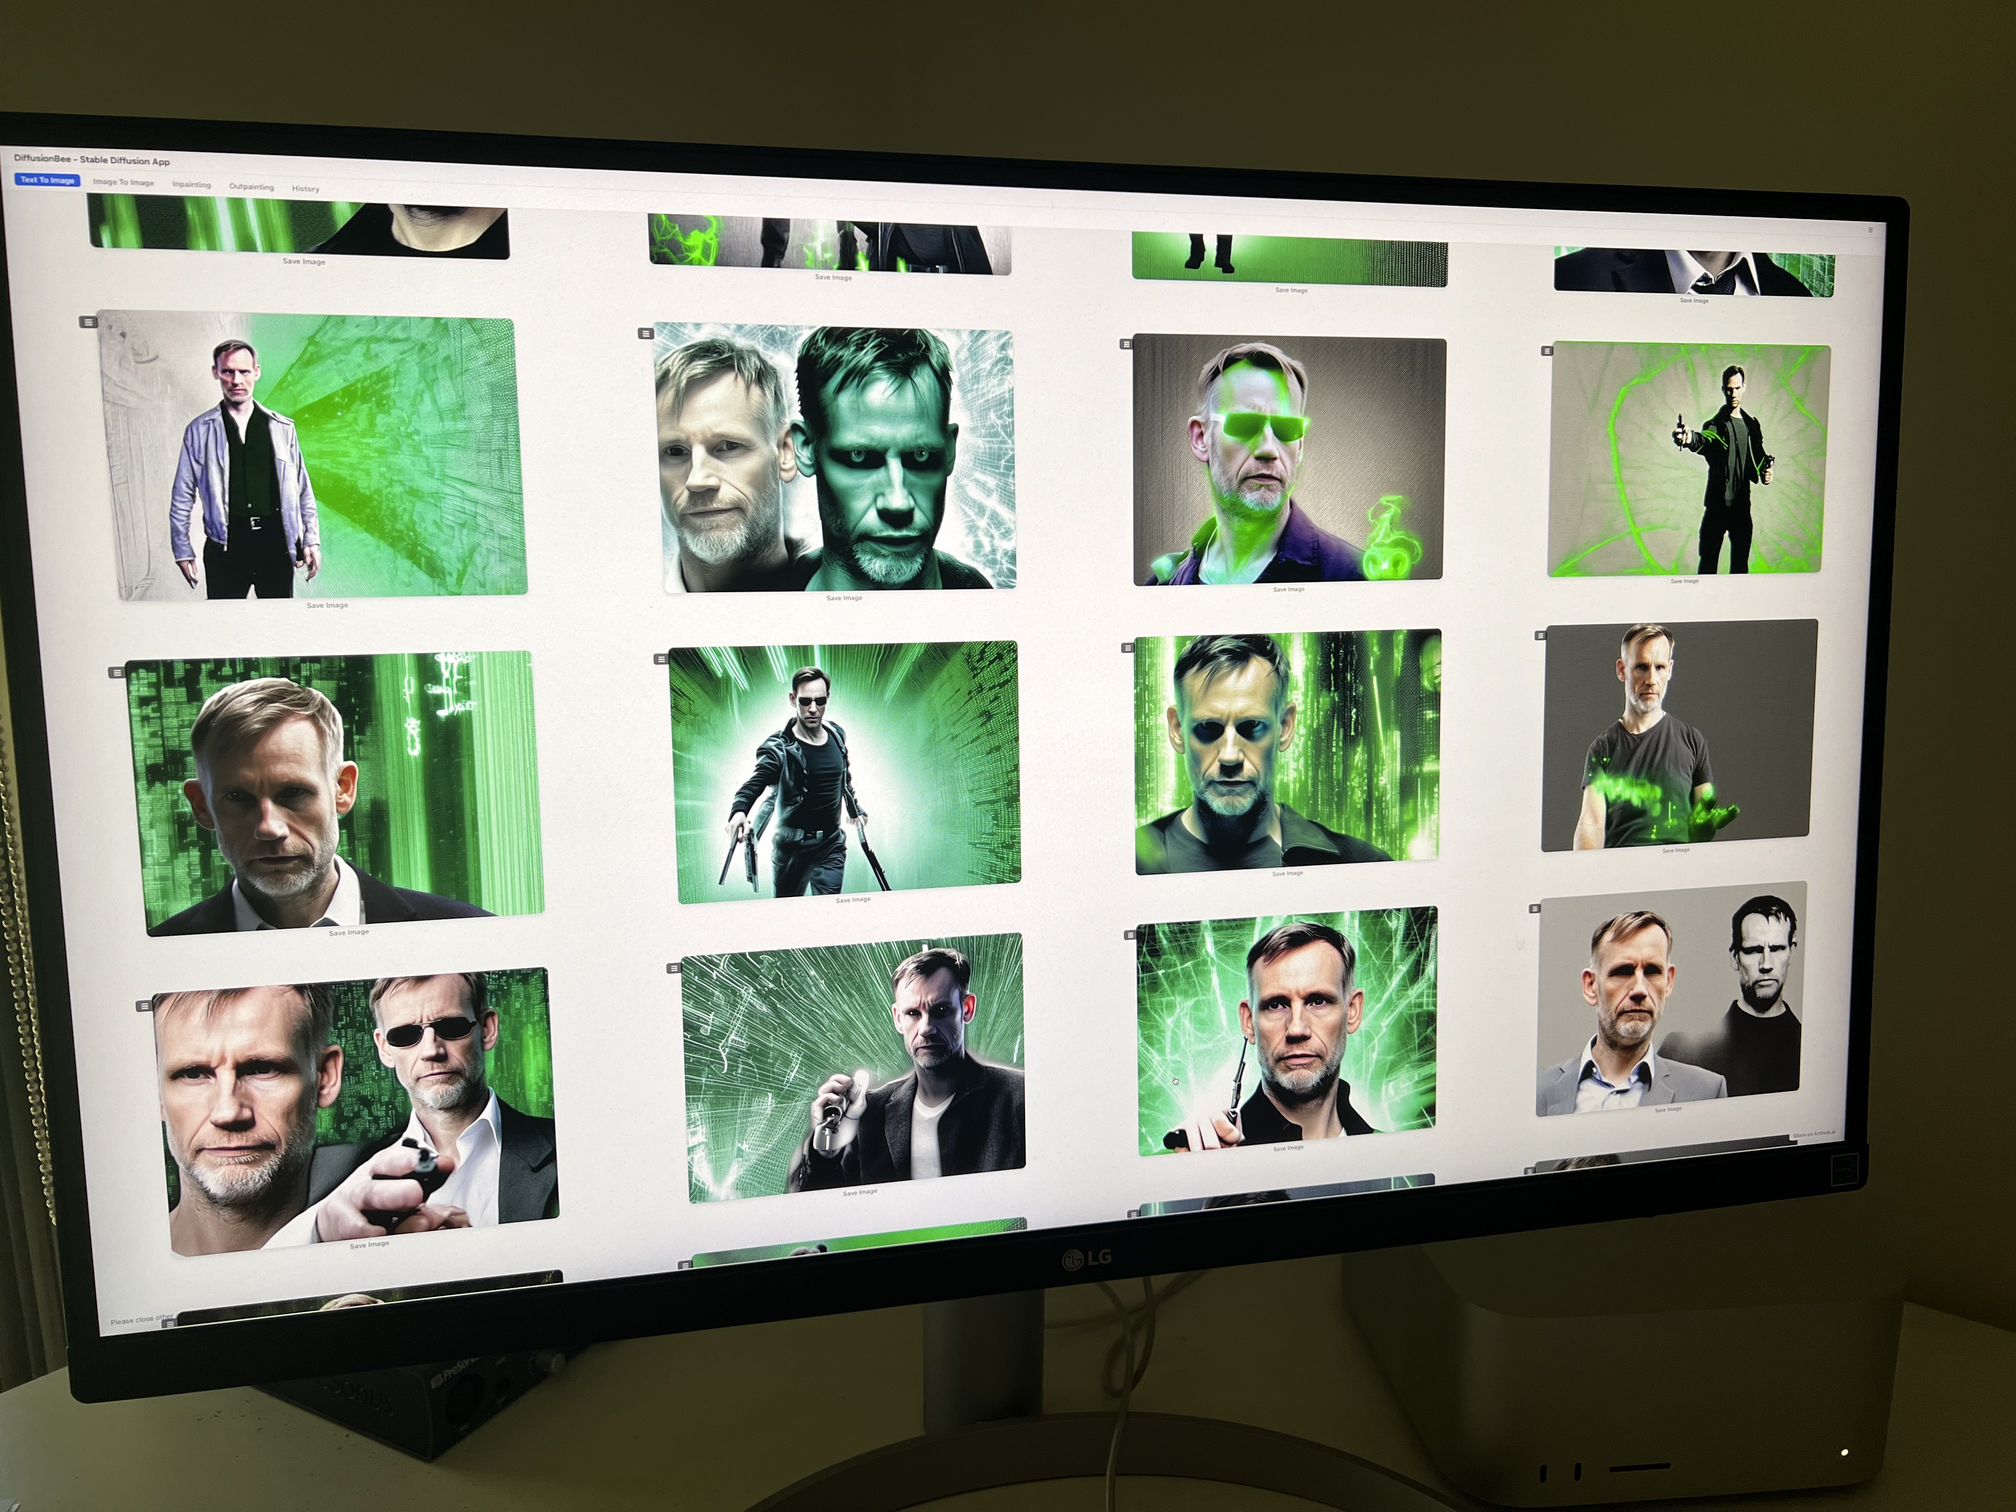
The pictures below were generated in DiffusionBee (with the custom model option). The txt2image prompt I used was: ‘picture of nigel adams spcman as neo from the movie matrix, green digital background, badass’ lol.
Leave a comment